

How to Install Precast Concrete Steps: A Professional Step-by-Step Guide
A field-tested walkthrough of the planning, site prep, lift, and finish work that turns precast units into a durable, code-compliant entrance.
Properly installed precast units deliver a finished, code-compliant entrance in a fraction of the time it takes to form and pour stairs on site. Whether you are upgrading a residential porch, replacing crumbling cast-in-place treads on a commercial building, or building a new ADA-compliant access point, the decision to install precast concrete steps comes with real advantages: factory-controlled quality, predictable dimensions, faster project turnaround, and a smoother handoff between trades. This professional guide walks through the full installation sequence, from site evaluation through final caulk and backfill, so you can plan the work confidently or hire a contractor with eyes wide open.
Why Precast Steps Outperform Site-Cast Alternatives
Cast-in-place stairs require formwork, reinforcement, multiple inspections, and a long curing window before they can carry foot traffic. Precast units arrive on site already cured to design strength, eliminating the weather risk, layout error, and labor overhead that come with a poured set. Because units are manufactured in a controlled plant environment, the concrete mix, vibration, finish, and dimensional tolerances are tighter than what a field crew can deliver under tarps and time pressure.
A typical residential stoop replacement that would take a site-cast crew several days finishes in a single morning with a precast unit. For property owners and general contractors, the schedule certainty alone is worth the conversation. Architects gain a reliable shop-drawing approval cycle and clean coordination with adjacent finishes such as cladding, railings, and landscape grading. Quality, in this context, is not just a cosmetic concern: a tight tolerance on riser height keeps the entrance safe, code-compliant, and free of trip hazards for the life of the building.
Plan Before You Measure
Every successful install starts at the desk, not at the curb. Pull the building elevation, measure the finished floor height to the proposed landing, and verify that the rise-and-run dimensions of the unit you are ordering will match local building code. The 2021 International Residential Code caps individual riser height at 7.75 inches and sets a minimum tread depth of 10 inches; commercial occupancies fall under different IBC sections. Confirm the count and unit dimensions with your supplier before they cast.
Confirm two more inputs before fabrication begins:
- Finished grade. The bottom step must align with the finished walkway elevation, not raw soil. If the walk is being poured later, dimension to the future top of slab.
- Door swing and threshold. A 1-inch top-step drop below the threshold prevents water intrusion and accommodates door clearance.
- Handrail attachment. Note where rail posts will land. Cores can be cast into the unit if you tell the plant before pour day.
If you are working with reputable precast concrete stairs suppliers, expect a shop drawing back within a week showing exact dimensions, weight, lifting inserts, and recommended footing details for your sign-off. Resolving questions on paper costs hours; resolving them in the field costs days.
Site Preparation: The Foundation of a Successful Install
Excavation and Compaction
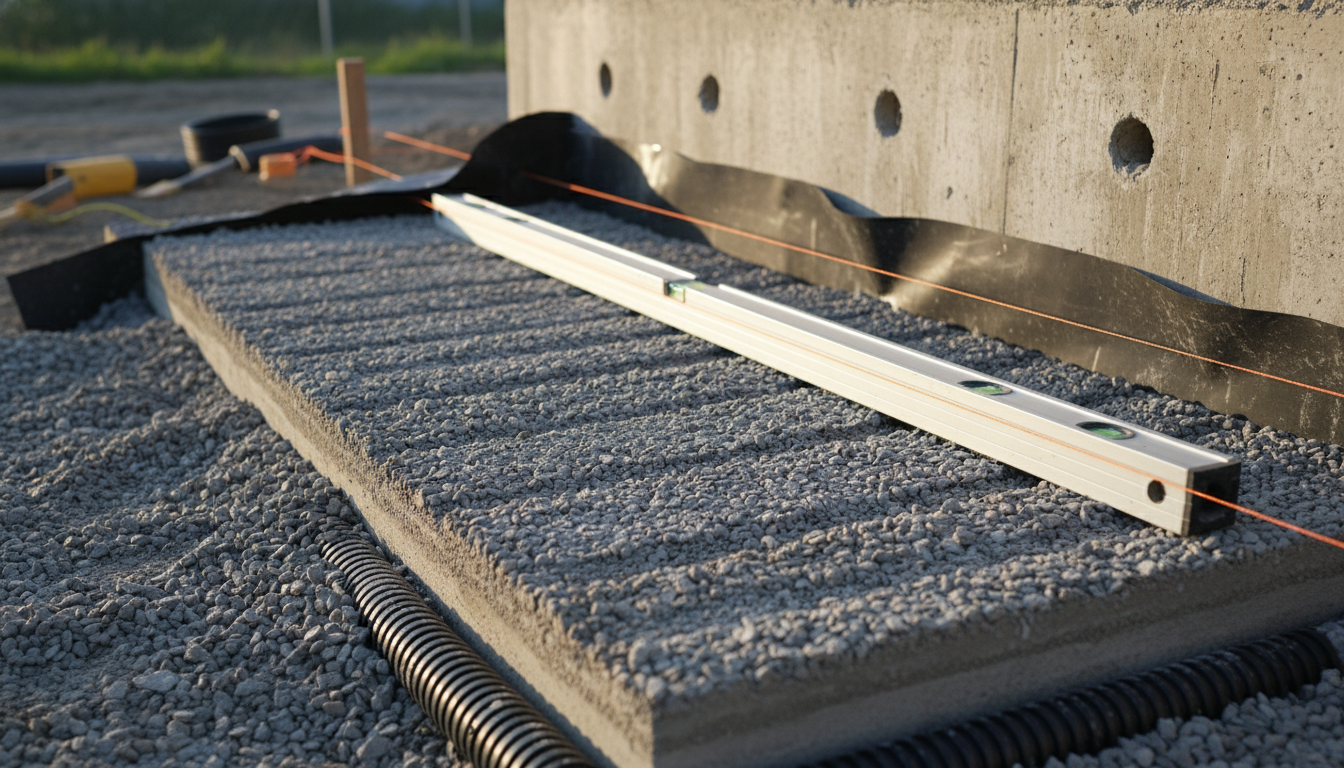
Dig the footing trench at least 12 inches below the local frost line, or to undisturbed native soil if the unit will sit on a slab. Most residential sets rest on a 6-inch compacted gravel pad, but heavier commercial units may require a poured concrete footing with rebar dowels for lateral restraint. Compact the gravel in 2-inch lifts with a plate compactor; loose fill is the single most common cause of step settlement in the first year.
Crowned, well-graded crushed stone (3/4-inch minus) outperforms pea gravel for this application because it locks together under pressure and resists migration. A 4-inch base over poor soils will fail; do not skimp on depth in clay-heavy regions or where freeze-thaw cycles are common.
Drainage and Vapor Control
Water is the enemy of any concrete-on-soil structure. Slope the gravel pad away from the building at 1/4 inch per foot, install a perforated drain tile if the area collects runoff, and cover the pad with a 6-mil polyethylene vapor barrier when the steps adjoin a heated foundation wall. Skipping these details rarely surfaces immediately, but it shows up two winters later as efflorescence, scaling, and freeze-thaw cracking.
How to Install Precast Concrete Steps: The Step-by-Step Sequence
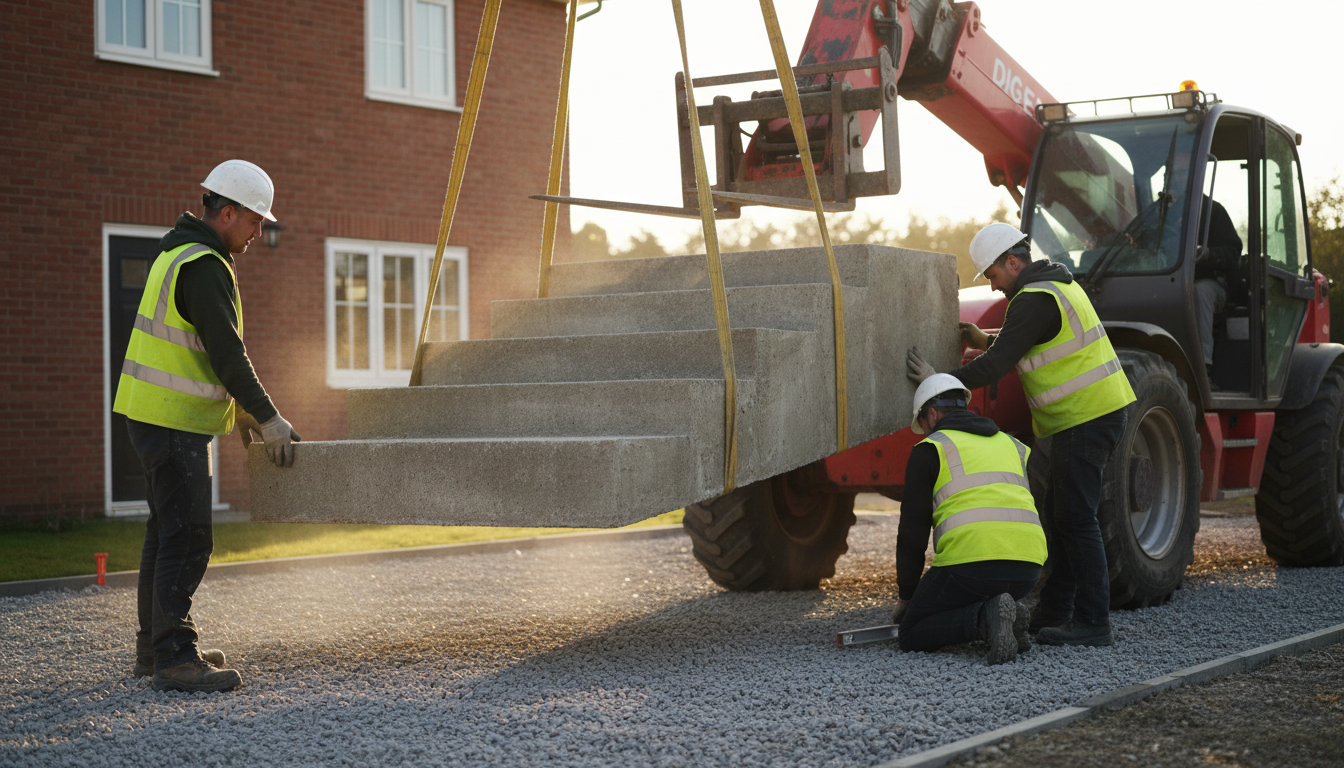
A properly equipped crew of three can install precast concrete steps in under three hours once the site is ready. Here is the field sequence we follow on Heldenfels projects, adapted for both residential stoops and small-commercial entries.
Equipment You Will Need
A compact telehandler, a mini excavator with a thumb attachment, or a small boom truck handles the lift. Most residential precast step units weigh between 1,000 and 4,000 pounds; commercial monolithic stairs reach 10,000 pounds and require larger equipment. Round out the kit with rated lifting slings or chains, a four-foot mason’s level, plastic or stainless shims, non-shrink grout, polyurethane sealant, and the plate compactor used during base prep.
Lift, Set, and Plumb
Attach the slings to the cast-in lifting inserts, take a slow test lift to verify balance, and walk the unit into position over the prepared pad. Once the bottom tread sits in place, level the unit in two directions: front-to-back at a 1-percent pitch away from the building for drainage, and side-to-side dead level. Use plastic or stainless shims under the corners until the bubble reads true. Aluminum shims corrode over time and stain the surrounding concrete; avoid them.
Take a final reading with the laser or string line before signing off on placement. A 1/8-inch correction is much cheaper to make while the equipment is still hooked to the piece than after the slings come off.
Anchor, Grout, and Caulk
Drill the anchor holes per the manufacturer’s spec, set the dowels into epoxy or non-shrink grout, and torque the connection plates against the foundation wall. Pack the gap between the back of the unit and the wall with non-shrink grout, then run a continuous bead of polyurethane sealant along the joint to handle thermal movement. Backfill the sides with the same compacted gravel used in the pad, sloping the surface grade away from the unit.
Final Walk-Through
Verify the riser height variance is within 3/8 inch across all steps, confirm tread surfaces drain freely, and clean any cure-membrane residue with a mild acid wash if the supplier recommends it. Check that handrail cores align with the rail design and that any ADA detectable warning surfaces sit flush. Document the install with photos for the warranty file.
Common Installation Mistakes to Avoid
Most callbacks on precast stair sets trace back to one of four shortcuts:
| Mistake | Why It Fails | Fix |
|---|---|---|
| Skipping the gravel pad | Disturbed soil compresses unevenly, causing settlement | Excavate to undisturbed soil, place 6 inches of crushed stone, compact in lifts |
| Aluminum shims | Oxidize, expand, and crack the unit at contact points | Use plastic, stainless steel, or composite shims rated for the load |
| No expansion joint at the building | Thermal cycling shears the bond and admits water | Tool a 3/8-inch joint and seal with polyurethane |
| Wrong sealant choice | Latex caulks fail fast under foot traffic and UV exposure | Specify polyurethane or hybrid polymer sealants |
When a homeowner forum thread posts photos of cracked or tilted stoops, you can usually reverse-engineer one of these four causes from the image alone. The fixes are inexpensive at install time and disproportionately costly to retrofit later.
Field tip: Mix a small bag of non-shrink grout in a wheelbarrow rather than a bucket. The wider mouth lets you work the mix to a stiff, trowelable consistency without overwatering, which is the leading cause of grout shrinkage and joint cracking on precast installations.
When to Bring In an Experienced Precast Contractor
A do-it-yourself install can work for a single residential stoop if you have access to a piece of lifting equipment, level ground, and a helper or two. The math changes quickly when the units exceed 4,000 pounds, the run includes intermediate landings, or the site has tight access between buildings. Commercial installations almost always benefit from a turnkey precaster who manufactures, delivers, and erects under one contract: quality control, schedule, and accountability all live in the same hands.
If you are spec’ing a project that involves multiple stair runs, ADA ramps, or integrated retaining walls, talk to an experienced precast contractor before the bid set is final. Early engagement frequently surfaces value-engineering opportunities, catches constructability issues while they are still cheap to solve, and locks in plant capacity before the schedule gets crowded. The cost of a one-hour conversation in design development routinely saves weeks on the back end of a project.
From Footing to First Footstep
Precast remains one of the most reliable, durable, and cost-effective ways to deliver a finished entrance. The keys to a successful project are the unglamorous fundamentals: accurate field measurements, a properly compacted base, clean drainage detailing, and disciplined leveling and anchoring during the lift. When those basics are respected, a precast installation outperforms a poured set on every measure that matters: schedule, finish quality, and long-term durability. Cut a corner on any one of them and the unit will tell on you within a few seasons.
The best installs look easy because the planning was thorough. Spend the time on shop drawings, base preparation, and anchor detailing up front, and the lift itself becomes the routine part of the day.
Planning a Precast Stair Project?
Heldenfels Enterprises has manufactured and erected precast stairs across Texas since 1909. Talk to our team about shop drawings, lead times, and turnkey installation for your next project.
Start the Conversation